Posts

Showing posts from July, 2017

Just Java Final Code With No Errors With No U.I

JUST JAVA JAVA CODE package com.example.android.justjava; /** * IMPORTANT: Add your package below. Package name can be found in the project's AndroidManifest.xml file. * This is the package name our example uses: * <p> * package com.example.android.justjava; */ import android.os.Bundle; import android.support.v7.app.AppCompatActivity; import android.view.View; import android.widget. TextView ; import java.text.NumberFormat; /** * This app displays an order form to order coffee. */ public class MainActivity extends AppCompatActivity { int quantity = 0 ; @Override protected void onCreate(Bundle savedInstanceState) { super .onCreate(savedInstanceState); setContentView(R.layout. activity_main ); } /** * This method is called when the plus button is clicked. */ public void increment(View view) { quantity = quantity + 1 ; display( quantity ); /** * This method is called when the minus
My Trial With Coffee Ordering App

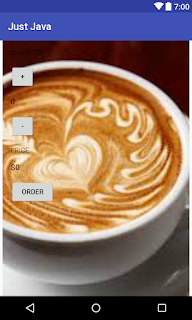
Image
<? xml version= "2.0" encoding= "utf-8" ?> < LinearLayout xmlns: android = "http://schemas.android.com/apk/res/android" xmlns: tools = "http://schemas.android.com/tools" android :layout_width= "match_parent" android :layout_height= "match_parent" android :orientation= "vertical" tools :context= ".MainActivity" > < RelativeLayout android :layout_width= "match_parent" android :layout_height= "wrap_content" android :paddingLeft= "5dp" android :paddingRight= "5dp" > < ImageView android :layout_width= "match_parent" android :layout_height= "match_parent" android :src= "@drawable/images" android :scaleType= "centerCrop" andr android :layout_gravity= "top"

debugger sentence formation

We&#39;re making really good progress so far. As we continue to build more challenging things for our app, we&#39;re going to have to improve our debugging skills. In this video, we&#39;re going to learn about how to use a tool called the debugger. We&#39;ll access the debugger using Android Studio. And the debugger is meant to help us identify and fix errors in our code. The great thing about the debugger is that we can pause the app at a certain point in time, and then we can inspect the whole state of the app more closely. Normally, when the app is running on our device, all the code gets executed very rapidly. Within milliseconds, it can respond to button clicks, update the screen, calculate the price, and etc. But with the debugger, we can pause at a specific line of code in our app, then we can step through our code line by line as quickly or slowly as we want. If you want to learn more techniques on how to debug your app in Android St

ORDER COFFEE INITIAL HALF CODE

Image
<? xml version= "2.0" encoding= "utf-8" ?> < LinearLayout xmlns: android = "http://schemas.android.com/apk/res/android" xmlns: tools = "http://schemas.android.com/tools" android :layout_width= "match_parent" android :layout_height= "match_parent" android :orientation= "vertical" tools :context= ".MainActivity" > < TextView android :layout_width= "wrap_content" android :layout_height= "wrap_content" android :layout_margin= "16dp" android :text= "quantity" android :textAllCaps= "true" /> < Button android :id= "@+id/button3" android :layout_width= "48dp" android :layout_height= "48dp" android :onClick= "increment" android :layout_marginBottom= "16dp" android :

Code For The Happy Birthday App Final Project Lesson 3

Image
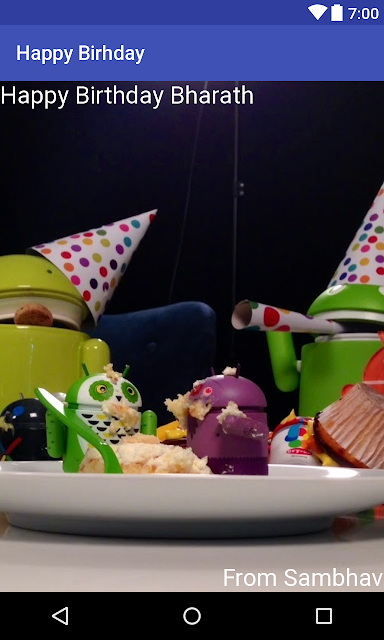
<? xml version= "1.0" encoding= "utf-8" ?> < RelativeLayout xmlns: android = "http://schemas.android.com/apk/res/android" xmlns: tools = "http://schemas.android.com/tools" android :layout_width= "match_parent" android :layout_height= "match_parent" tools :context= ".MainActivity" > < ImageView android :src= "@drawable/happybirthday" android :layout_width= "match_parent" android :layout_height= "match_parent" android :scaleType= "centerCrop" /> < TextView android :text= "Happy B'day Bharath" android :fontFamily= "sans-serif-light" android :layout_width= "wrap_content" android :textColor= "#ffffff" android :layout_margin= "20dp" android :layout_height= "wrap_content" a

Code For The The Happy Birthday Project

Image
<? xml version= "1.0" encoding= "utf-8" ?> < RelativeLayout xmlns: android = "http://schemas.android.com/apk/res/android" xmlns: tools = "http://schemas.android.com/tools" android :layout_width= "match_parent" android :layout_height= "match_parent" tools :context= ".MainActivity" > < ImageView android :src= "@drawable/happybirthday" android :layout_width= "wrap_content" android :layout_height= "wrap_content" android :scaleType= "centerCrop" /> < TextView android :text= "Happy Birthday Bharath" android :layout_width= "wrap_content" android :textColor= "#ffffff" android :layout_height= "wrap_content" android :textSize= "24sp" /> < TextView android :text= "From Sambhav"

Initial Code For Happy Birthday App

< RelativeLayout xmlns : android = " http://schemas.android.com/apk/res/android " xmlns : tools = " http://schemas.android.com/tools " android : layout_width = " match_parent " android : layout_height = " match_parent " tools : context = " .MainActivity " > < TextView android : text = " Happy Birthday YOURFRIENDHERE " android : layout_width = " wrap_content " android : layout_height = " wrap_content " /> </ RelativeLayout >

Discussion about Constraint Layout

Before starting on the next video, we want to bring to your attention a new feature in new Android Studio - Constraint Layout - that may require you to make some code modifications to the steps you see in the following videos. Keeping up with the changes Google is constantly improving the Android platform and adding new features. This is great for you as a developer, but it makes learning harder sometimes. Recently Google released ConstraintLayout ; a tool that makes it super fast to create responsive UIs with many different types of components. ConstraintLayout is a great tool to have on the sleeve, but for this class, we will use RelativeLayout , LinearLayout simpler. All of this matters to you because the new project templates in Android Studio now use ConstraintLayout as default, which makes the code you see on your computer a bit different from what is on the screen. Current Layout File In the new versions of Android Studio, after choosing the Empty Activity te